A number of firmware options are available. The recommended firmware is ZMK and this page will go over the process of setting up ZMK for ErgoBlue. Users who have questions about ZMK should join its Discord server.
ZMK is still a work in progress so there will be some rough edges. This will certainly improve with time. ZMK is also not as feature rich as QMK though development is happening at a very quick pace.
There are other firmware options such as BlueMicro and numerous QMK forks though I have no personal experience with those and can't speak to how well they work. In particular I recommend against QMK forks due to the setup difficulty, even for advanced users.
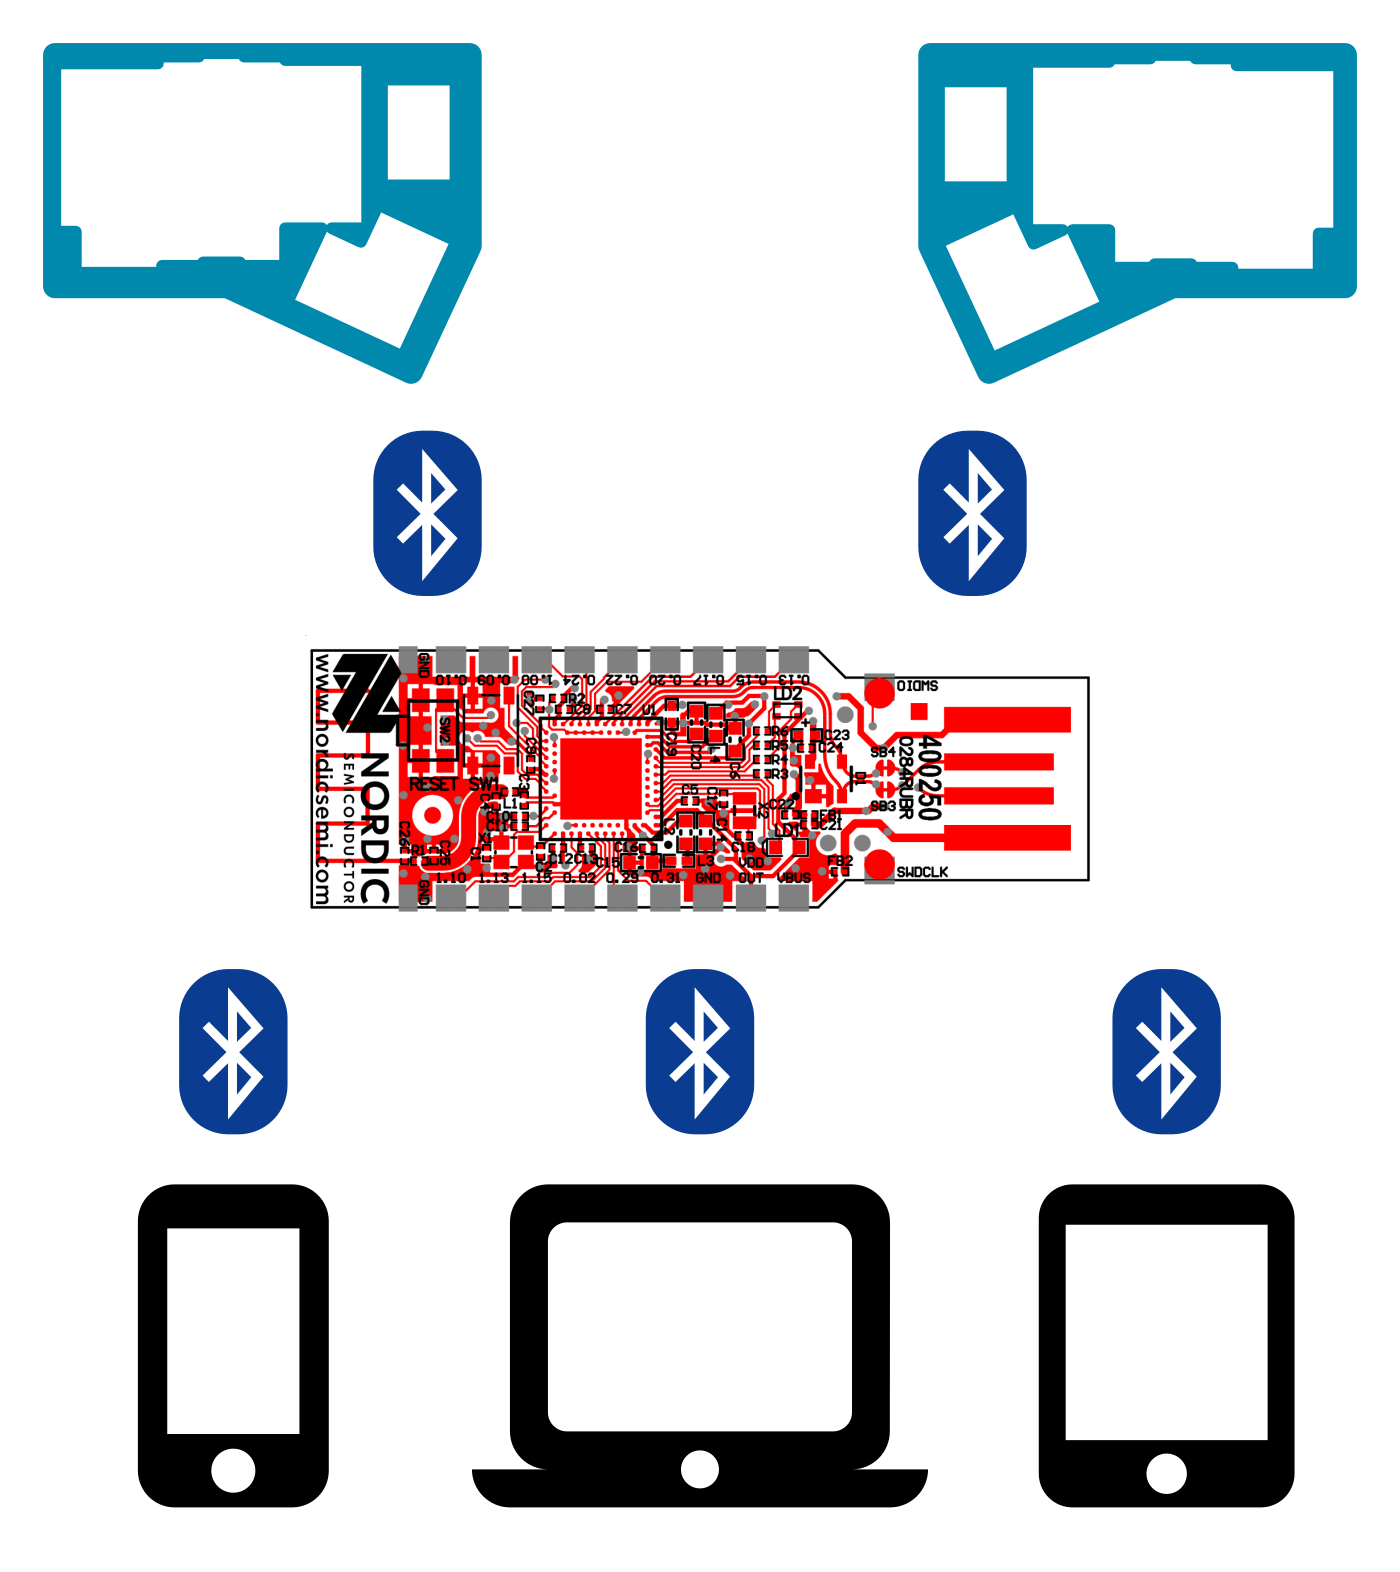
The external dongle maintains state between the two keyboard halves so things such as layers can work. The dongle also serves as a Bluetooth keyboard itself. ZMK allows multiple devices to it simultaneously and the user can switch between them with a custom defined keymap.
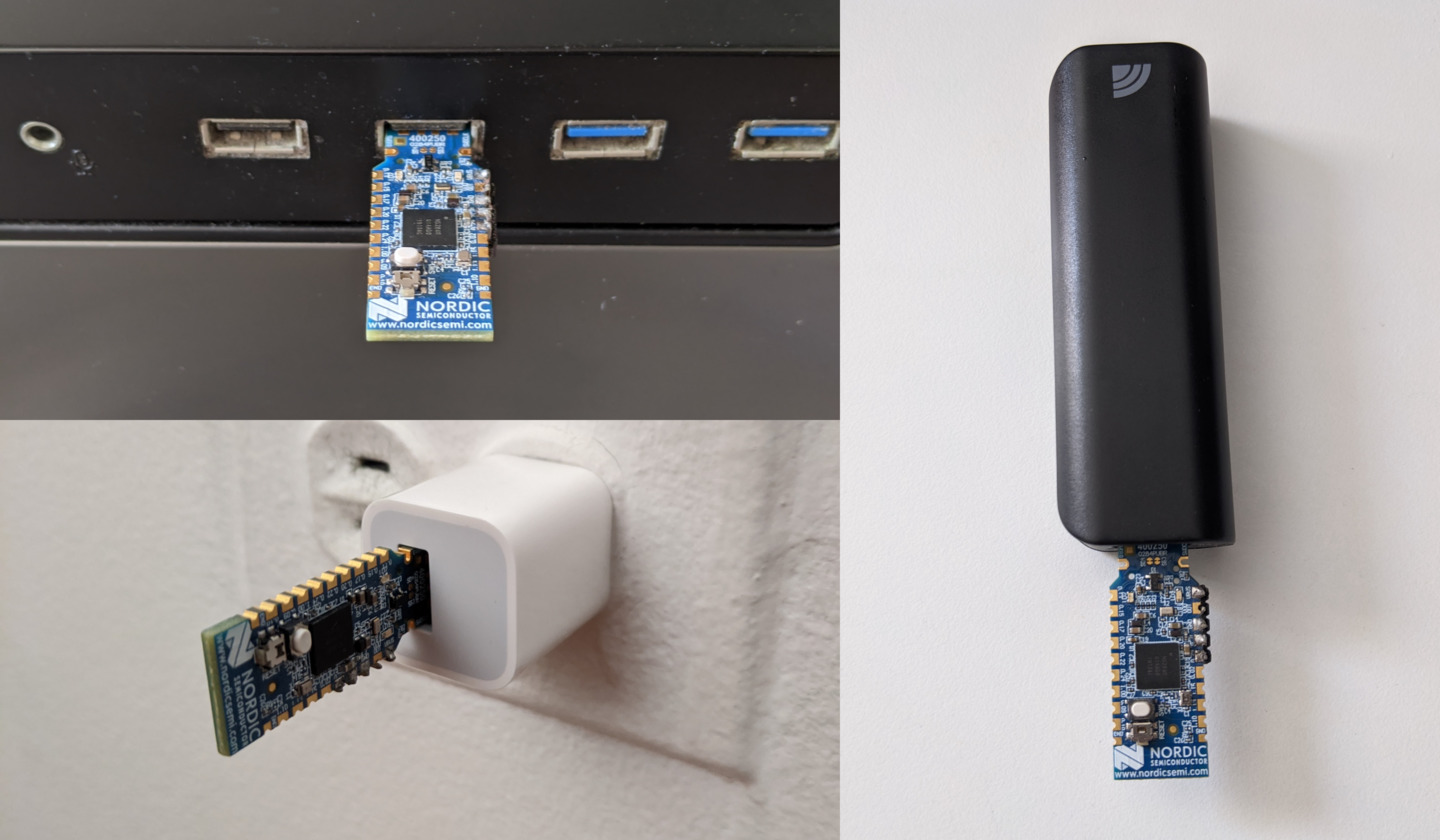
When plugged directly into a computer, the dongle also acts as a regular wired keyboard. If you're primarily using it with a laptop and/or mobile devices, you may plug it into an AC USB adapter at home or a portable charger on the go.
While it's possible to use one of the keyboard halves as the controller, it's not something I've personally tried. Doing so will negatively impact the battery life by a significant margin.
You will need to download nRF Connect for your operating system. You may find the firmware setup video helpful. Note that this page will remain the authoritative source for ZMK on ErgoBlue. Details will be added and updated as necessary.
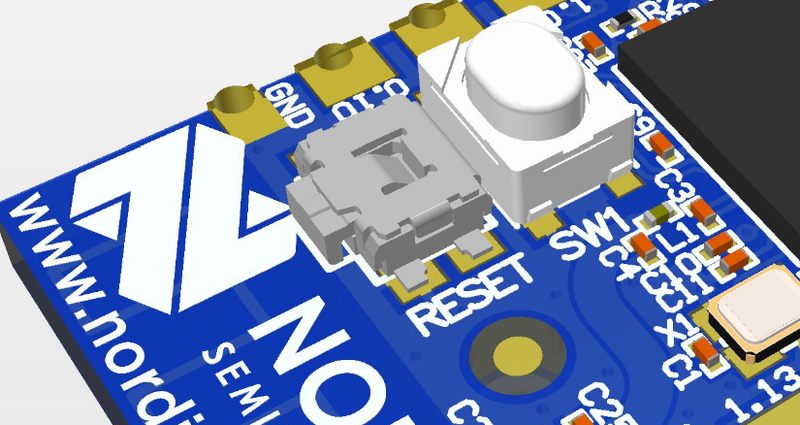
The Nordic nRF52840 Dongle has two buttons: one large white button facing facing up and a sideways button next to it. The sideways button is the reset button and you'll need to press that in order to update the firmware with nRF Connect.
zmk.hex onto the external dongle.s140_nrf52_7.2.0_softdevice.hex with nordic-left.hex onto the left
half. ZMK should automatically connect to it. Pressing a switch should cause
a key to be pressed on the computer that the ZMK dongle is plugged into.s140_nrf52_7.2.0_softdevice.hex and
nordic-right.hex on the right half.ZMK relies on GitHub Actions to compile the keyboard firmware so users do not need to have any compiler installed locally. The following steps will allow you to customize your keymap by making changes to a GitHub repository. If you had difficulty connecting the ZMK dongle to the keyboard halves in the previous section, this will also allow you to pinpoint the cause by enable logging/debugging.
If one or both keyboard halves are not working, the ZMK dongle can log via USB
for debugging purposes. Add the following lines to config/ergoblue.conf.
# Turn on logging.
CONFIG_LOG=y
CONFIG_ZMK_LOG_LEVEL_DBG=y
CONFIG_LOG_STRDUP_BUF_COUNT=16
CONFIG_SERIAL=y
CONFIG_LOG_BACKEND_SHOW_COLOR=n

# Log via USB.
CONFIG_USB_DEVICE_STACK=y
CONFIG_USB_CDC_ACM=y
CONFIG_USB_CDC_ACM_RINGBUF_SIZE=8192
CONFIG_USB_CDC_ACM_DEVICE_NAME="CDC_ACM"
CONFIG_USB_CDC_ACM_DEVICE_COUNT=1
CONFIG_CONSOLE=y
CONFIG_UART_INTERRUPT_DRIVEN=y
CONFIG_UART_LINE_CTRL=y
CONFIG_UART_CONSOLE=y
CONFIG_USB_UART_CONSOLE=y
CONFIG_UART_CONSOLE_ON_DEV_NAME="CDC_ACM_0"
CONFIG_USB_UART_DTR_WAIT=n
Saving and committing the file will trigger a new ZMK build. You will want to
flash the new zmk.hex from GitHub Actions.
Users can use the Arduino IDE on most operating systems to view the USB console. Advanced users may choose a different program for this purpose. See ZMK's USB debugging page for more information along with other programs that display the logs.
When using Arduino:
/dev/ttyACM. On macOS, it will be something with the prefix
/dev/tty.usbmodem.Logging should be disabled again when it is no longer necessary for debugging. Depending on the operating system, there may be negative security implications for having logging enabled.
config/ergoblue.keymap as necessary. See
ZMK documentation for a full list of codes.zmk.hex onto your ZMK dongle.